Editing the zen of reffing
A guide to editing a documentation project through the Gitlab user interface

Using sphinx and git, I turned the google doc of the Zen of Reffing Roller Derby handouts into a website that can be collaboratively worked on. If you’ve never heard of those things, do not fear! Here’s a guide to making edits to the Zen of Reffing without ever opening a terminal. At the end, I’ll also talk about making to do lists.
The hardest part is going to be getting used to the jargon. But if you’re into roller derby, you’re probably used to jargon nobody else understands :D
Concepts
Feel free to skip through this part (and go straight to the Walkthrough) and just come back if there’s stuff that you don’t understand in the next parts.
Source files, output files
The zen of reffing website (currently) is here. To create that site, us humans write stuff into files called “source files”. Then a computer program (called sphinx) reads those files and turns them into HTML files that a web browser can read and display. These are the “output files”.
Having one set of files that humans write into and one set of files that web browsers read is spiffy, because browsers understand HTML and writing an HTML file by hand is a pain!
Repositories
The source files are stored on a repository (or repo). This repository is maintained by a small non-profit and runs a piece of software called Gitlab.
In Gitlab, you can edit the source files, check out the history of edits, generate the output files, make lists of things to do…
Branches
On the Gitlab repository, you can have several versions of the same thing that live alongside each other. These are called branches.
If you want to make some changes, try some things out,… you can create a new branch. And when you’re done, you can either merge the stuff you changed into the main branch, or discard it (without messing anything up in the main branch), or set it aside and come back to it later. It’s like having “project.docx”, “project-test.docx”, “project-final.docx” and “project-final-2.docx” in a folder on your computer, but without it ever becoming a unintelligible mess!
ReStructured Text (.rst files)
In Word or LibreOffice, you select text, and you click on buttons to format the text. With RST files, you use punctuation to indicate what kind of text it is (is it a section title? a list? a table? …), and it gets automatically formatted. Then there is another file somewhere that says how to format each kind of text.
It’s a bit weird until you get the hang of it, but basically, you can just write plain text without worrying about what it looks like.
Walkthrough
First steps
Head to the zen of reffing repo.

You’ll need to create an account to be able to modify stuff. They filter accounts for spam bots by hand, so don’t worry if it takes a couple days. It’s a bit of an inertia killer, but being able to use Gitlab is totally worth it 😉
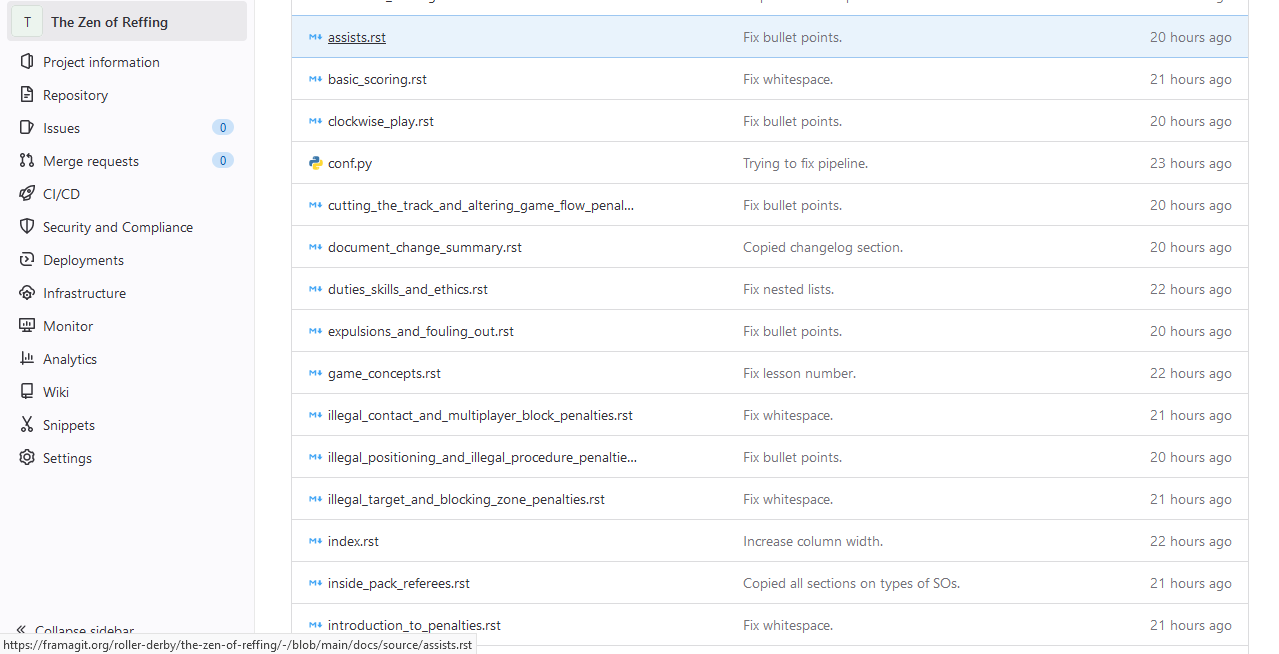
In the meantime, you can browse the files. If you go to docs -> source, you’ll find all the files that contain the text of the zen of reffing. There is one file per lesson (plus one file for the homepage, and a conf.py file that contains the configuration information) and these are the only files we need to modify.
Editing
- Create a branch so you don’t disrupt the user experience while working on changes.
- Edit files in your browser. Click
committo save your changes.- (Make sure you commit in the right branch.)
- When you’re ready to publish your changes, create a merge request with the main branch.
Say I want to edit the zen of reffing to account for the 2023 WFTDA changes regarding counterblocking. I want to be able to make mistakes, fix them, erase everything,… without it affecting the people who are reading the zen of reffing. So I’m going to create a new branch.
Creating a new branch
Click on the little plus sign.
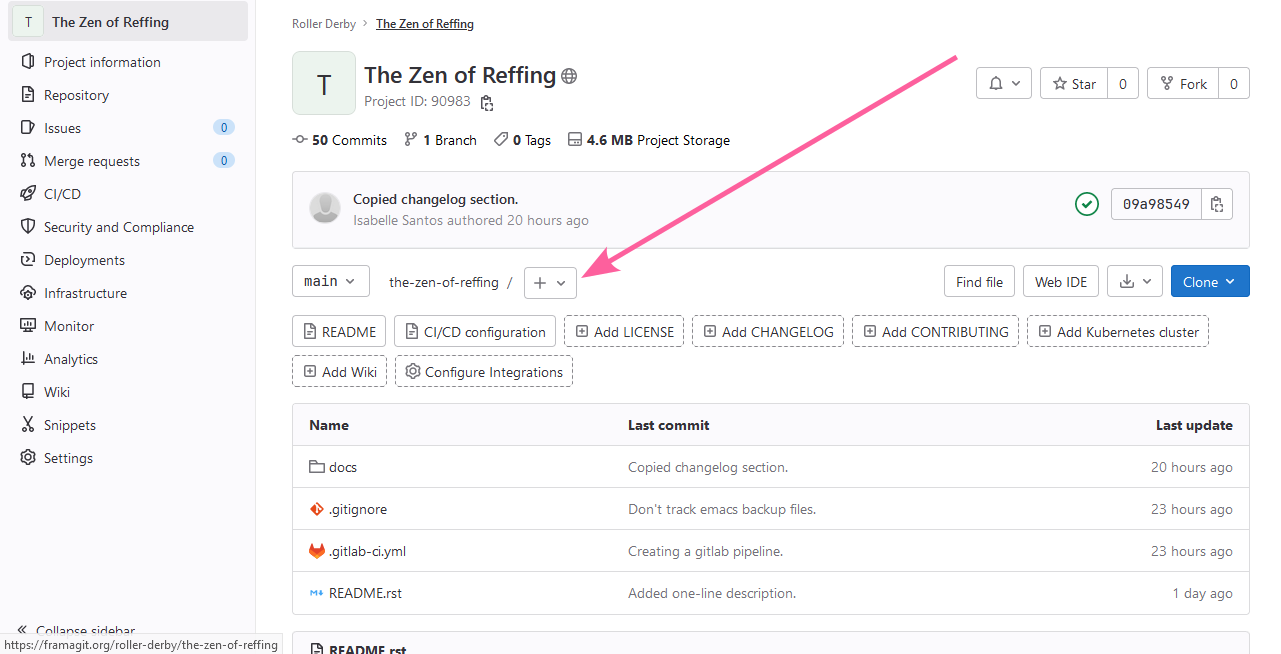
Then click on “New Branch” and fill in the name for the new branch. “Create from main” means that the branch will start out with everything that’s in the main branch.
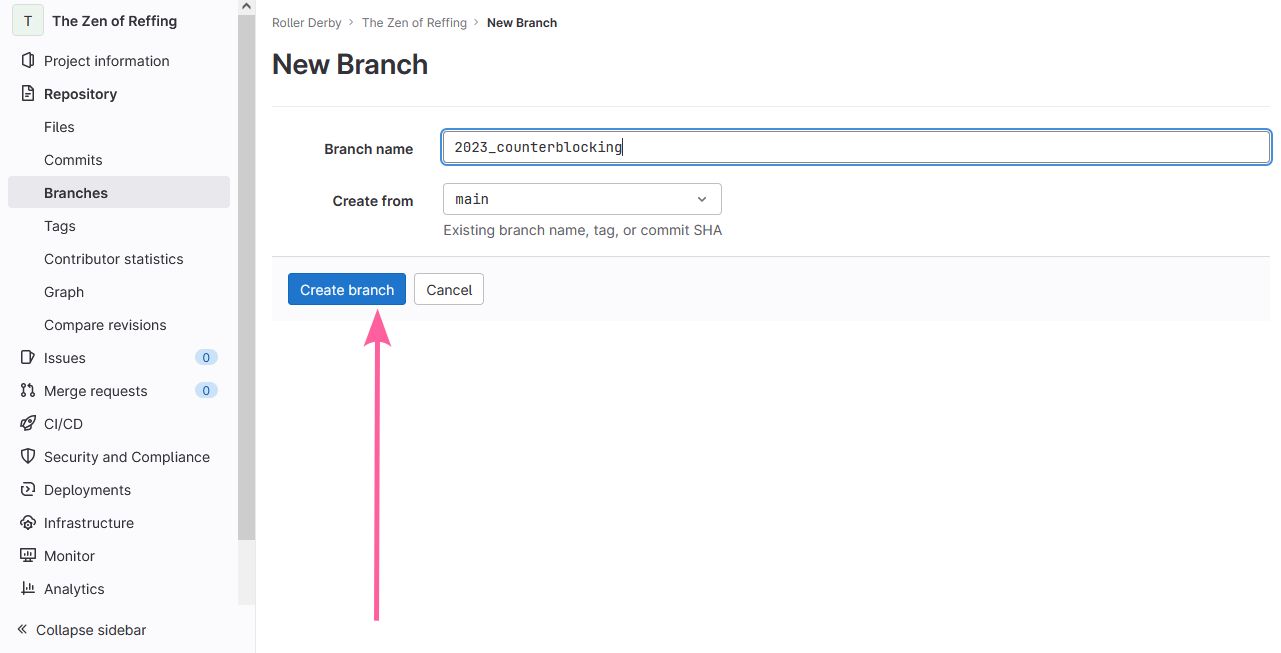
Click on the big blue “Create branch” button. This sends us back to the homepage, but this time, we’re on the 2023_counterblocking branch.
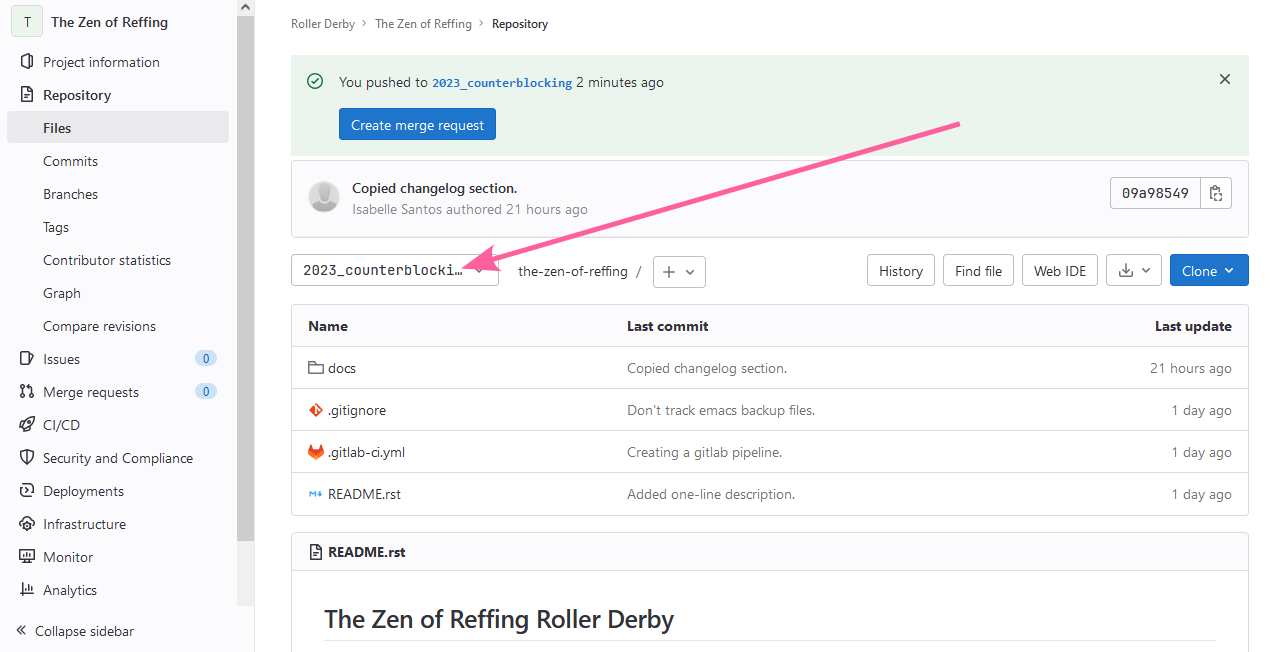
By default, the homepage is going to be on the main branch. Before you start working, make sure that drop-down menu has the name of the branch you’re working on selected.
Making edits
Just like you would do to find a file on your computer, go to the file you want to change. Here, I’m going to docs -> source -> introduction_to_penalties.rst.
There’s a big blue button with a little down arrow. Click on the arrow and select Edit. That changes the text of the big blue button to Edit. Click on it.
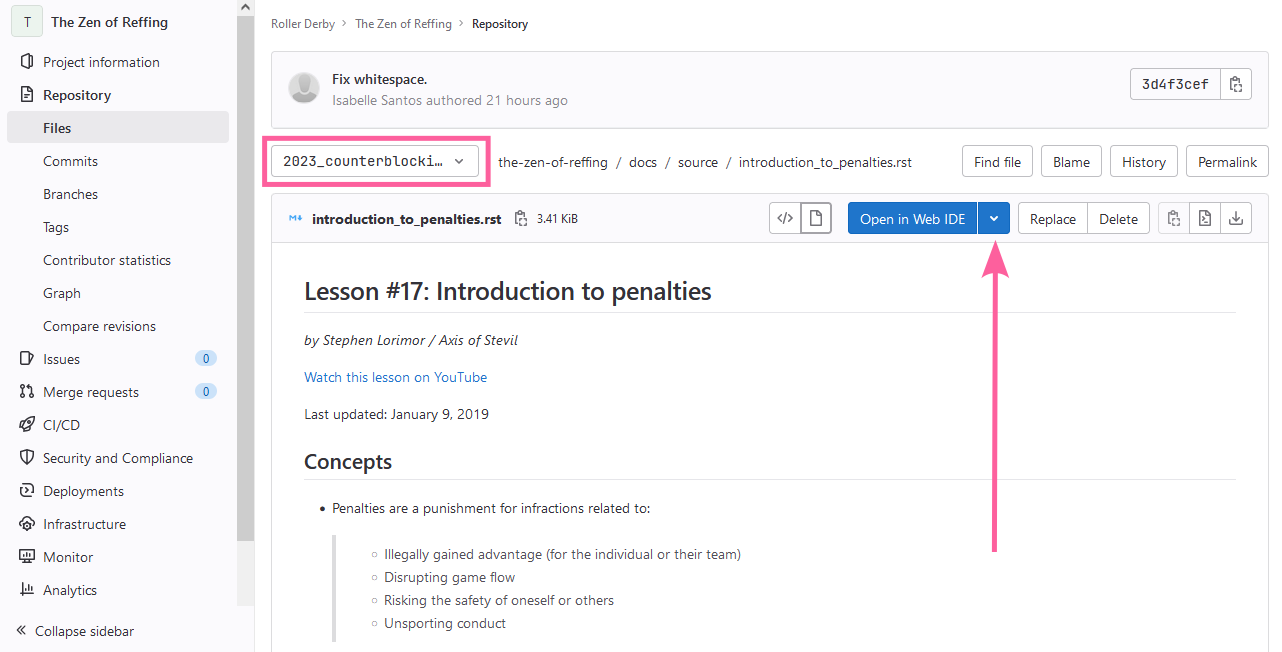
This opens a basic text editor. Type away !

When you’re done, scroll down.

Optional : in the Commit message box, you can type a summary of what you changed.
Click on the big blue Commit changes button and everything is saved!
Now we can go modify other files regarding with respect to counterblocking, or come back to this file to change other things. We can proofread and edit each other’s work… Once we’re ready to publish our changes for everyone else to read them, we can head on to the next section : Merging!
Merging with main
On the left-hand side, in the Repository section, click on Branches. Then click on Merge request.
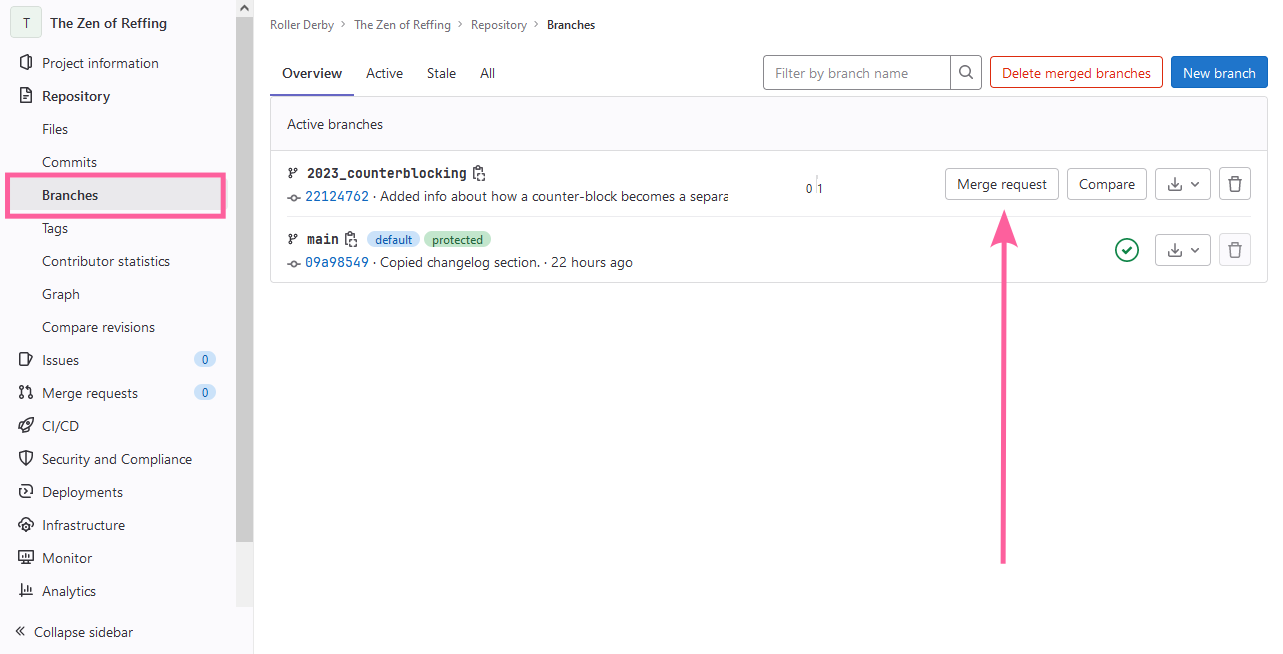
You can (optional) write a summary of what changed in the Description box.
If you scroll to the bottom of the page and click on Changes, you can see a list of everything that was changed in the branch being merged.
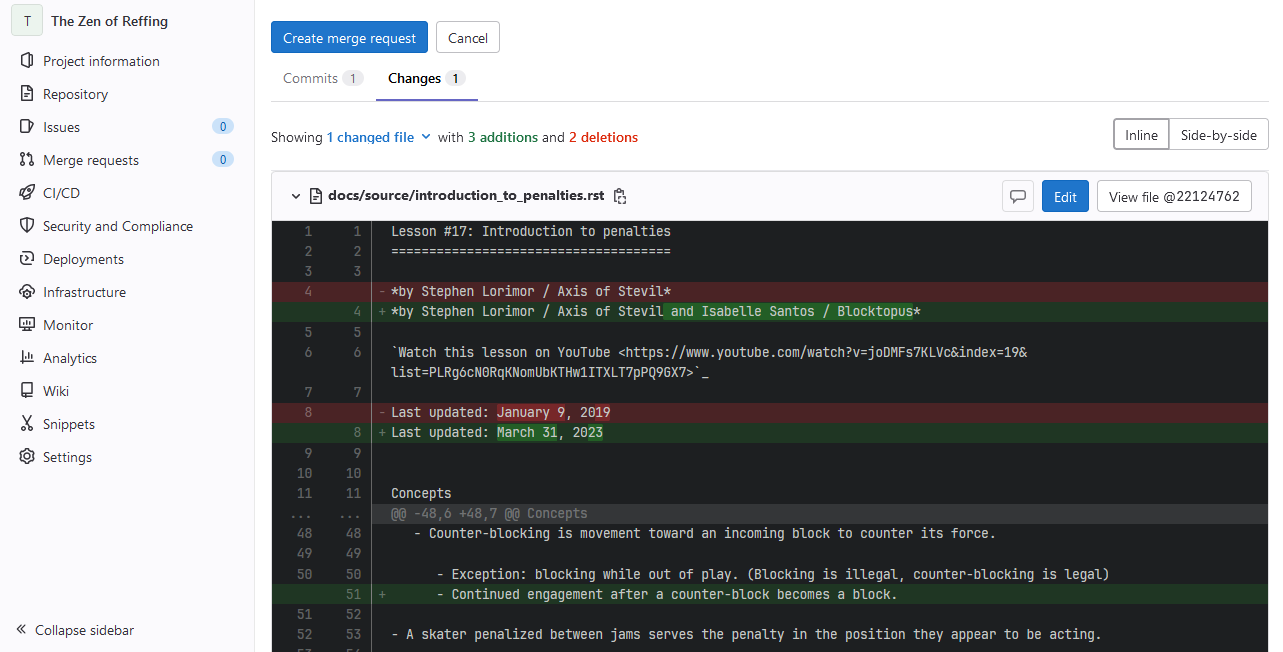
Then click on the big blue button that says Create merge request. Wait for a minute or two and the changes will appear on the Zen of Reffing webpage.
Making lists of things to do
In the side-bar to the left, click on Issues. Then click the big blue New issue button.
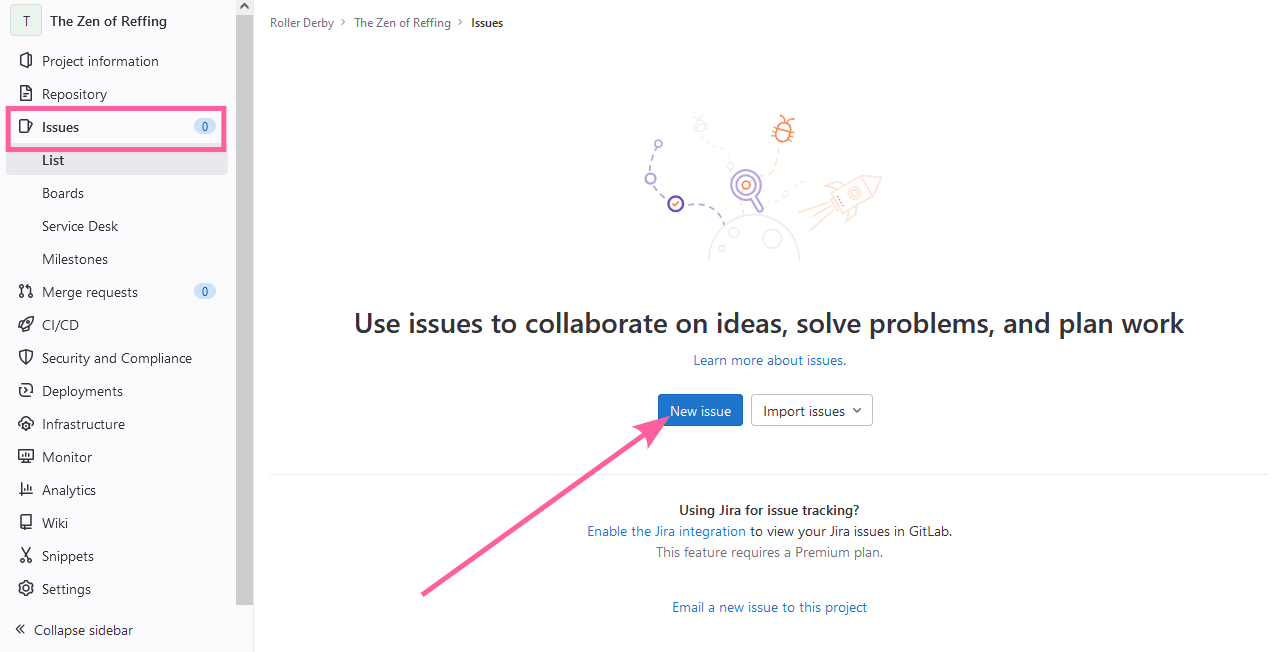
Each “issue” is basically an item on a to do list.
Give the issue a title and a description, and click the Create issue button.
This way, we can see a list of the things to do and check them off (“close” them, in the gitlab jargon) as we go.

